The PixelYourSite plugin allows us to embed the pixels of Facebook Ads, Google Ads (only in the paid version), and Google Analytics automatically, and without friction.
To do this, you can download the plugin itself from the WordPress plugin library for free. For additional features, such as the Google Ads integration, you’ll need to purchase the PRO version.
Creating a Facebook pixel
For those who do not yet have a pixel – you’ll need to first create a new pixel and embed it on our website.
Log in to Facebook Events Manager
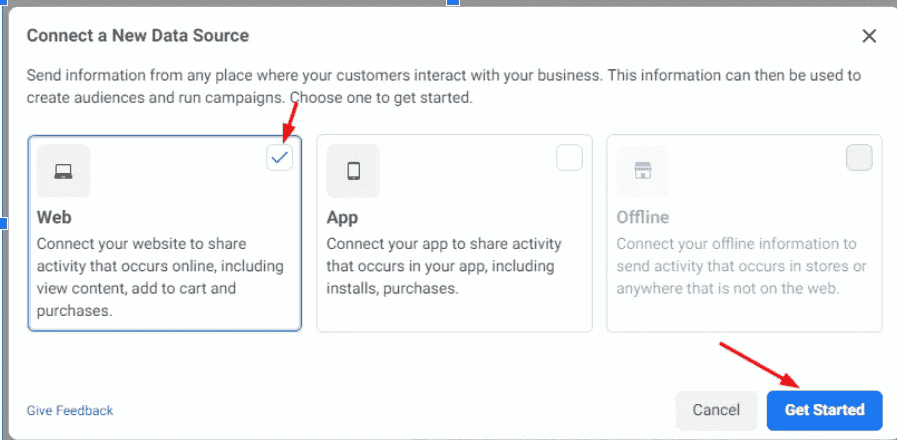
Immediately afterward we click on the plus sign “+”
Select Web and continue by clicking Get Started
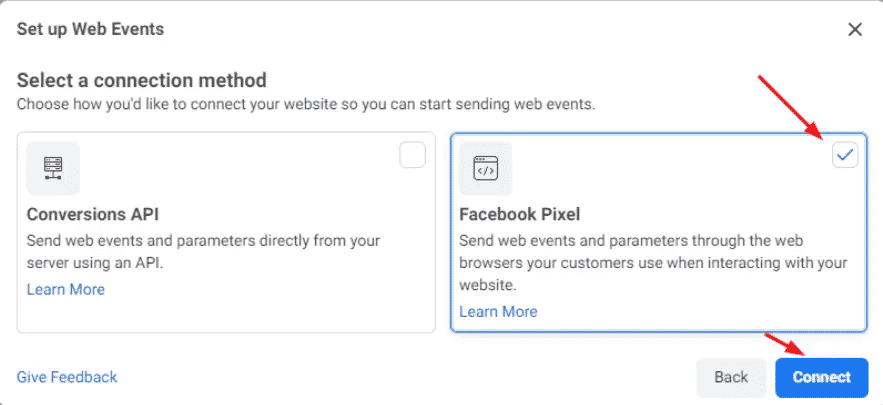
Select Facebook Pixel and click Connect
Give your pixel a descriptive name and you are set to go. Now, copy the Facebook pixel number so you can install it using the plugin.
We will proceed to install the PIxelYourSite plugin on our WordPress site. You can get the free version here or the PRO version here.
After the installation, we can edit the plugin’s settings by clicking on the Dashboard link.
Embedding the Facebook pixel to your site
In order to embed the Facebook pixel into your site, all you have to do is add the ID of the Facebook pixel in the dedicated field.
Important: We do not need the full code, only the ID (the number we copied in the first step).
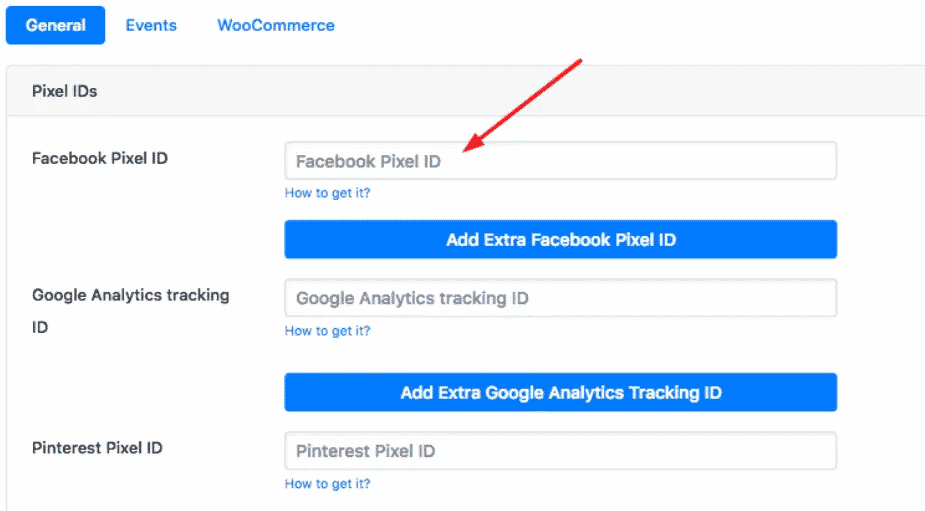
Do not forget to click Save Settings after pasting the ID of the pixel.
You can adjust additional settings by clicking on Facebook Settings in the plugin’s menu.
Enabling Enable Advanced Matching
When Advanced Matching is enabled, the plugin will send additional match data for site visitors.
This is a feature of Facebook that allows you to safely send additional information about your visitors. This information helps Facebook identify and match the visitor with an actual Facebook account. This is useful in cases where Facebook can’t handle it otherwise, such as a device with multiple accounts (e.g. a family PC).
The plugin will send information such as:
- phone
- First name
- Last Name
- City
- Country
- Postal Code
- Country
Embedding the Google Ads tag (Pro version only)
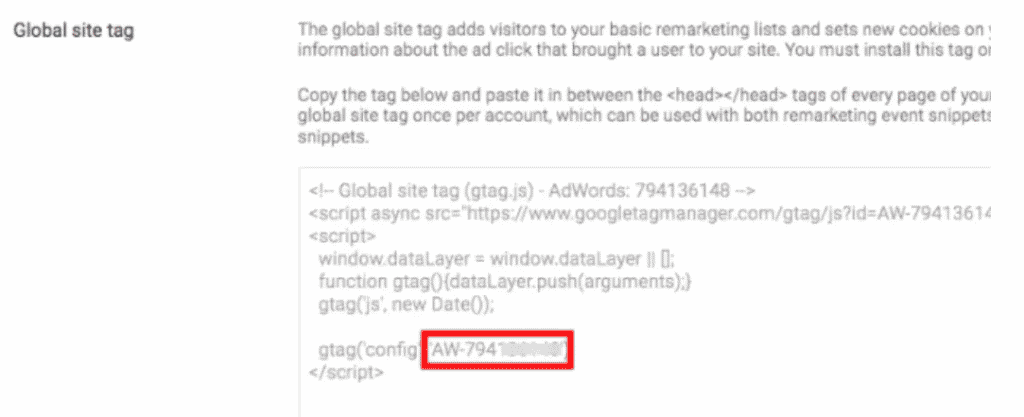
To embed the Google Ads tag into your site, you must purchase the PRO version of the plugin. Once purchased, all you need is to paste your AW ID (example: AW-1234567890) in the dedicated field.
Important: You do not need the full code, only the AW number.
Where can I find it?
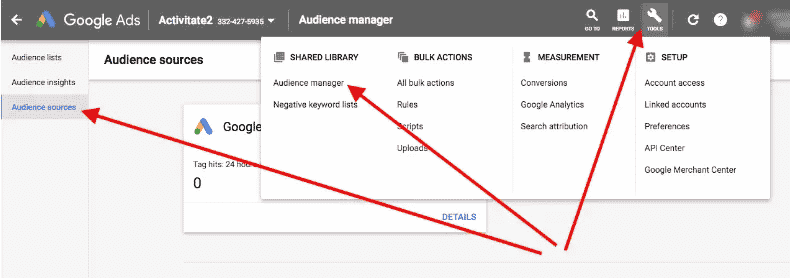
Open your Google Ads account and click the Tools link in the top menu. Under the Shared Library, click Audience Manager and the Audience Sources. Finally, click the Google Ads Details button and “Set Tags” at the bottom of the page.
Copy only your AW ID: (Example: AW-1234567890):
You can also grab this by selecting the Tag Manager installation method.
Embedding Google Analytics
Adding Google Analytics via PixelYourSite is fantastic if you’re already using WooCommerce. The PixelYouSite plugin does a great job of adding the various Enhanced Ecommerce events out of the box (also for the notorious GA4!), so it really saves a hell of a lot of work.
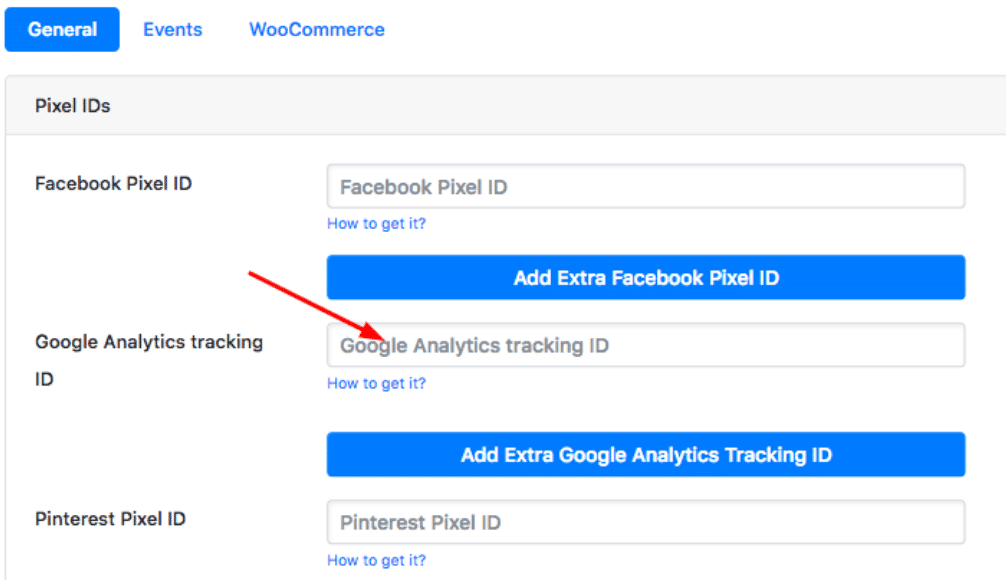
All it requires is simply pasting in your Google Analytics tracking ID (where do I find this? See here)
Final thoughts
This great plugin enables us to create events and track users on the site efficiently and accurately without any coding required. I personally highly recommend using this as it saves a lot of time and headache, and especially avoids unwanted tracking glitches.
You can download the free plugin here or purchase the PRO version of the plugin here.
To use the full plugin – you need to buy the package that includes both the plugin in the pro version and the plugin for creating a product feed – you can buy a combined package here