In this post, I’ll show how to quickly and efficiently set up a new conversion event for Google Ads.
The Google Ads pixel uses the same mechanism as other standard pixels, so its setup is pretty simple.
Alongside your conversion tracking, I also recommend implementing Google Ads Global Site Tag across your site.
Creating a Google Ads Conversion
Creating conversions can be done only after setting up an active Google Ads account.
In your account, use the top menu to navigate to Tools and Settings -> Measurement -> Conversions.
Conversions in Google Ads can originate from multiple sources:
- Website – Track conversion events that happened on your site
- App – Track conversion events that happened on your app (Android or iOS)
- Phone calls – Track incoming phone calls to your business using a dynamic phone number
- Import – Conversion events that a brought in from other sources such as Google Analytics or a CRM
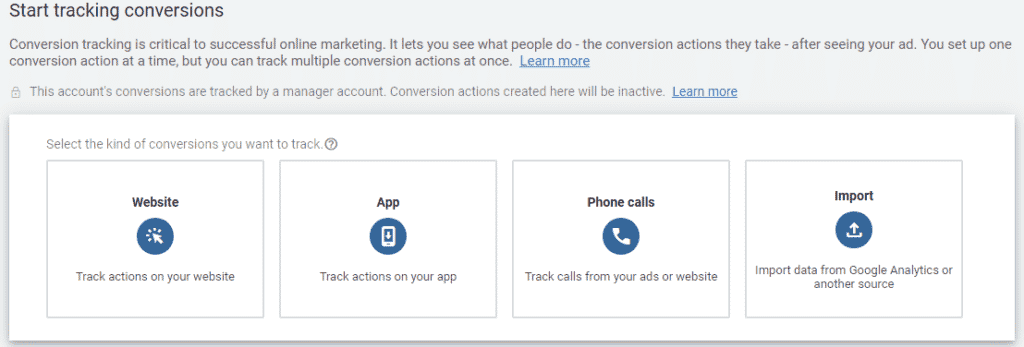
For sake of simplicity, this guide will only cover Website conversions.
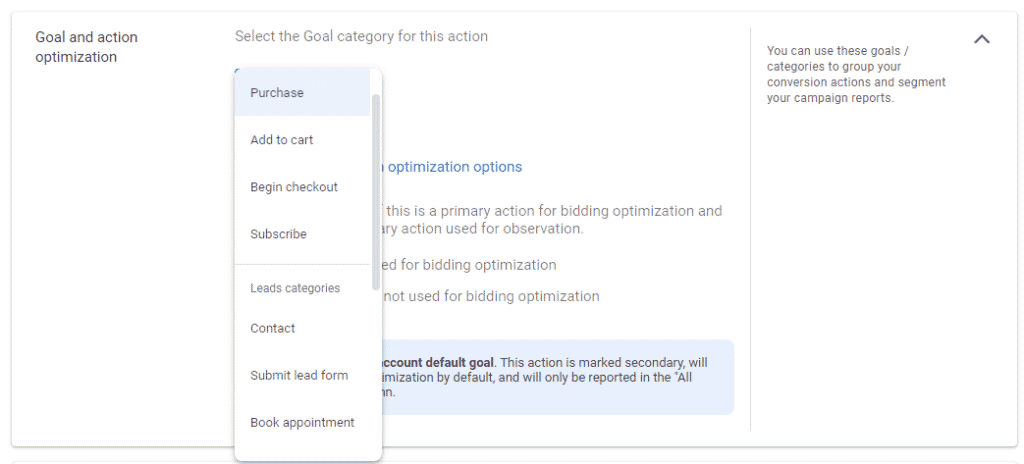
Goal category
After selecting the Website type, you can select the type of user engagement you want to track, e.g. Purchase or Submit a lead form.
This helps Google Ads group similar conversion actions together and make more sense of them.
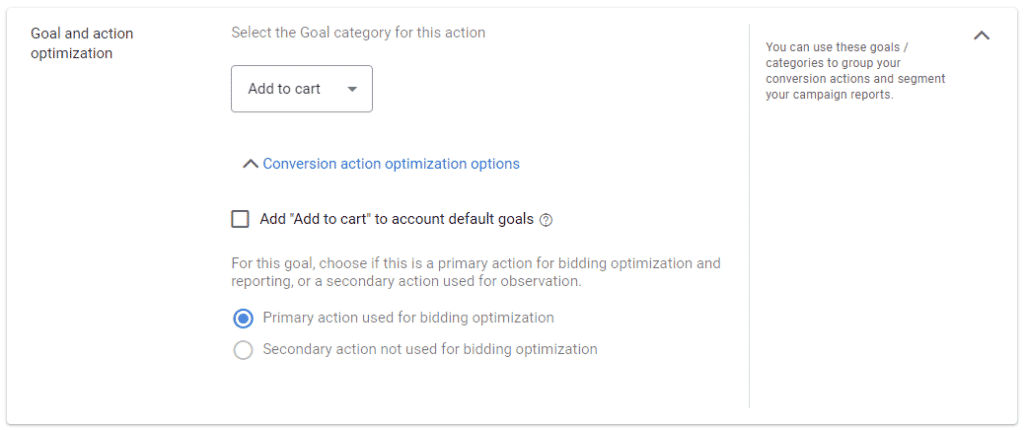
Next, you can select whether the conversion event should be set as a Primary or Secondary conversion.
A Primary conversion is our end goal, whereas a Secondary conversion is a step in the way. We won’t want the secondary conversions to be reported in the same manner as the primary nor would we want Google’s optimization algorithms to weigh them the same.
In a SaaS example, we can add Sign up as a Secondary conversion and Purchase as a Primary.
In an ecommerce example, we can add Add to Cart as a Secondary conversion (by unticking the “add to account default goals” checkbox) and Purchase as Primary.
Next, we give the conversion a memorable name that will be easy to comprehend.
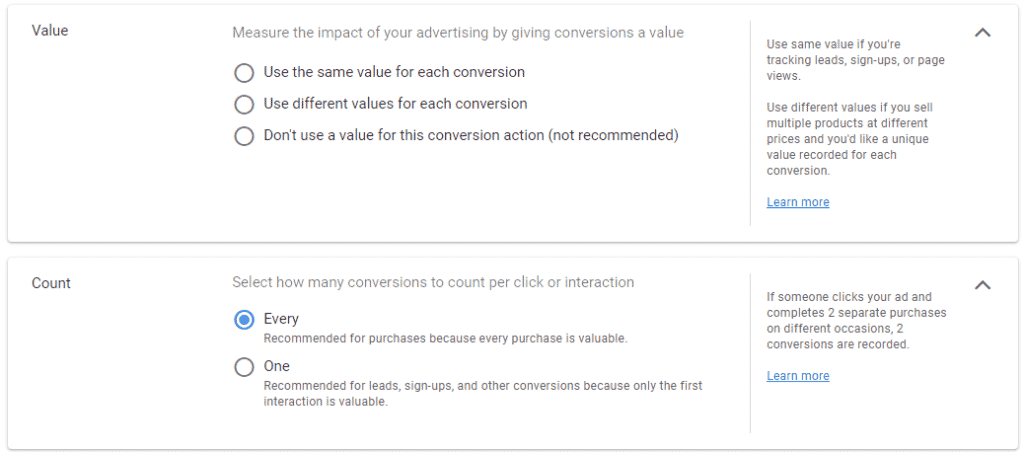
Event Value and Count
We can then select a value for the conversion. In some cases, we don’t know – a lead for a demo might be worth millions or a few thousand dollars, it’s hard to tell. But in others it’s easier – ecommerce will likely be the sum of the purchase, and SaaS can use a simplistic predicted LTV model.
This value can be passed dynamically as part of the event’s code.
You can then select whether easy conversion should be counted once per user. A lead form, no matter how many times submitted, is still worth the same if it’s the same user. Multiple ecommerce transactions by a single user are indeed the sum of all these.
Attribution
Last, but not least, you can tweak various attribution related settings. I usually keep these as is for most clients I work with.

A note on importing conversions from Google Analytics
While you can easily import your existing Google Analytics goals to be used as conversion events in Google Ads, in most cases I won’t recommend this.
There are many reasons for this, you can read about them in depth in this great post by Julian Juenemann. My main concern is that Google Analytics uses a Last In-Direct click attribution model and that its tracking is less accurate than Google Ads due to its cookie limitations.
So if you have the technical option to add Google Ads conversions I highly recommend you do so.
Manually installing the Google Ads Conversion
After you’ve saved the conversion you can choose how you want to install it on your site.
Installing the conversion manually requires first triggering the Global Site Tag. Assuming that tag has been implemented, you will be able to trigger your conversion event.
The event’s script should look something like this:
<!-- Event snippet for Demo Request conversion page -->
<script>
  gtag('event', 'conversion', {'send_to': 'AW-1234567890/abcdefghijklmnop'});
</script>
In the event snippet, you can find two IDs. The first is the tag ID (e.g. AW-1234567890) which is identical to the one used on the Global Site Tag. The second, referred to as the Conversion Label (e.g. abcdefghijklmnop), is used to identify the specific conversion action. For example, your site might have both a Demo form and a Sign Up form, and you will likely want to measure these separately.
Trigger this JS function whenever the conversion event happens.
Adding conversion value
If the conversion has a clear monetary value you can assign a conversion value using a parameter in the event. You can also set the currency in which you’re reporting, otherwise it will default to the account’s currency (reporting will in any case convert the value to the account’s currency).
gtag('event', 'conversion', {'send_to': 'AW-1234567890/abcdefghijklmnop','value': 1.0, 'currency': 'USD'});Adding custom variables
You can also add custom parameters to report on more granular conversions. For example, if you are running ads for a hotel chain with multiple locations, you can add a parameter that passes the name if the specific hotel the conversion was for.
You can read more in this post about Google Ads Custom Variables.
Installing a Google Ads Conversion using Google Tag Manager
Similar to other major platforms, Google Ads has a built-in tag in Google Tag Manager.
When creating the conversion, you can choose to install it using Google Tag Manager. This option will give you the relevant Conversion ID and Conversion Label values to use in GTM.
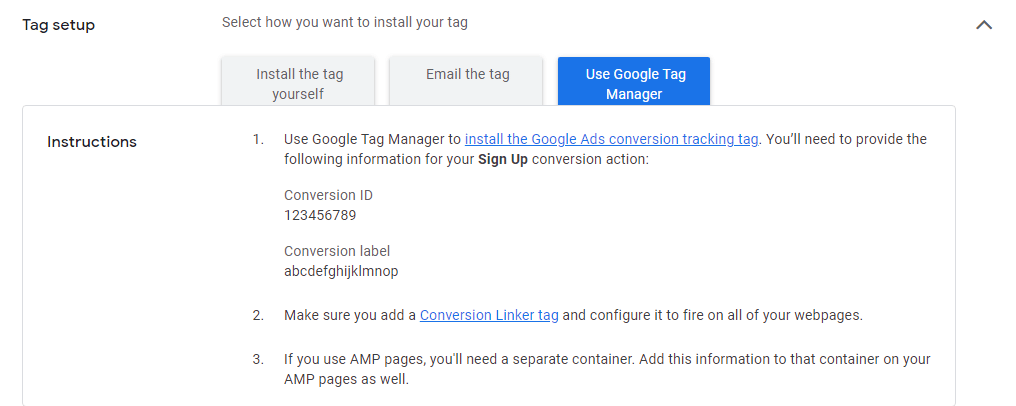
First, copy the Conversion ID. It should look something like this 1234567890 (without the AW- prefix).
Pro tip:
Since the Conversion ID is an account wide ID, it will be the same for all your account’s conversions. That’s why I recommend saving it as a Variable of the type Constant so you can reuse it in new Google Ads conversions you create.
- Go to your GTM account and open the relevant container
- Click “Add a new tag”
- Name the tag something memorable, e.g. Google Ads Demo Request
- Under Tag Configuration select “Google Ads Conversion Tracking”

- In the Conversion ID field, paste the Conversion ID you copied, e.g. 1234567890
- In the Conversion Label field matching value from your Google Ads account, e.g. abcdefghijklmnop
- Under Triggering, choose a new trigger. This trigger will depend on the specific user action you want to track as a conversion (e.g. a lead form submission).
- Click Save
The final tag should look like this:

Be sure to publish the changes in your GTM container by clicking Submit and then Publish
The Conversion Linker Tag
After saving the Google Ads tag, GTM will likely prompt you to add a Conversion Linker tag to your container. This is highly recommended to do, as it helps with aligning the first/third-party context in which your various tags operate. This tag has no available configurations, so just save it and make sure its part of the published container.
Checking the implementation
Once the tag has been installed you can verify that the data is flowing in correctly by using the Conversions reporting. While conversions you trigger manually for testing won’t count in your campaigns, you can still see that the conversion will become active.

- Unverified – The conversion tag hasn’t been triggered yet
- No Recent Conversions – Conversion tag triggered but no conversion was captured on a campaign over the past 7 days
- Tag Inactive – Tag was previously active, but no conversions of any type were triggered over the past 7 days
- Recording Conversions – Conversion tag active and conversion captured on a campaign over the past 7 days
- Removed – Conversion tag has been disabled in Google Ads