As discussed in a previous post about Facebook’s Event Matching, there are various ways that the Facebook pixel (client and server side) is able to match a certain event with a user.
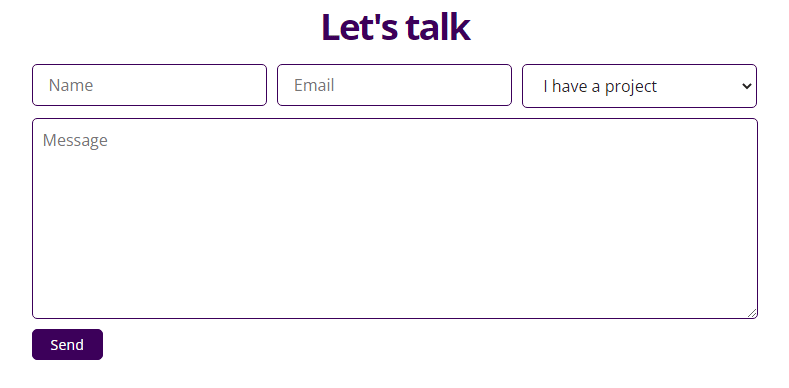
These methods are split into two – deterministic and probabilistic. For the deterministic methods, we need explicit identification of the user. One way that the Facebook pixel is able to achieve that is, well, by collecting user information that the user provides on the website, i.e. on forms.
Facebook offers two methods to collect this data – manual or automated.
User Data Parameters
There are multiple user parameters that can be sent to Facebook. These fields include:
- Phone number
- First name
- Last name
- ZIP Code
- City
- State
- Country
- Date of Birth
- Gender
- External ID (such as CRM ID)
As you can see, not all of these can provide accurate identification of a user. For example, a pixel sending over to Facebook user parameters of “Elad Levy from Modiin” will probably match half a dozen users or more. For optimal matching, a unique identifier such as an email or phone number is recommended.
Manually sending user data
Hardcoded pixel
If you have the Facebook pixel installed hardcoded on your site follow these instructions.
The basic Facebook pixel load you have should look similar to this:
<script>
  !function(f,b,e,v,n,t,s)
  {if(f.fbq)return;n=f.fbq=function(){n.callMethod?
  n.callMethod.apply(n,arguments):n.queue.push(arguments)};
  if(!f._fbq)f._fbq=n;n.push=n;n.loaded=!0;n.version='2.0';
  n.queue=[];t=b.createElement(e);t.async=!0;
  t.src=v;s=b.getElementsByTagName(e)[0];
  s.parentNode.insertBefore(t,s)}(window, document,'script',
  'https://connect.facebook.net/en_US/fbevents.js');
  fbq('init', '1234567890');
  fbq('track', 'PageView');
</script>
(I’m intentionally ignoring the <noscript> tag and you should too)
The above script initializes the specific pixel ID on your site and then triggers a PageView event.
If the user on your site is already identified (i.e. logged in), you can update the init function in the script in this way:
fbq('init', '283859598862258', {
  em: '[email protected]',
  fn: 'Jon',
  ln: 'snow'
});
Note that email values will be hashed automatically by the pixel using SHA-256
Any event following this init function will carry the user data.
If the user identification happened after the pixel has been initialized, you can trigger a second init call and subsequent events will carry the user data parameters.
Google Tag Manager
If you installed the Facebook pixel using Google Tag Manager (GTM), I hope you’ve used the great custom template created by Simo Ahava (now managed by the Facebook team). I explain why it’s better than using a Custom HTML tag in this post. If you’re sticking to Custom HTML, just follow the instructions for the manual implementation above.
The setup is pretty straightforward in GTM.
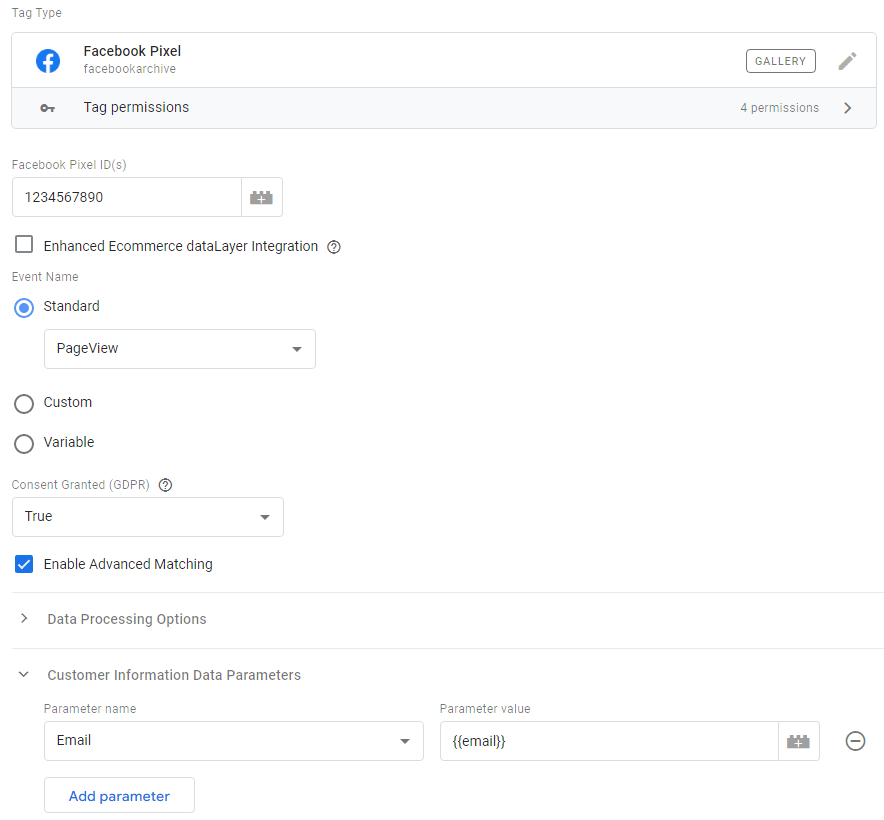
In your Facebook Pixel tag, tick the “Enable Advanced Matching” checkbox. This will open up a new section named “Customer Information Data Parameters”.
Under the new section, you can select the available parameters (e.g. Email, First Name etc.) and match them with the relevant variable holding that data.
This too can be done on the user identification (i.e. the signup or log-in event) using a custom event.
Important note
If you’re using the GTM template, the fbq(init) method is called only once per page. This means a manual init event using a Custom HTML tag is required for sending Advanced Matching keys to events beyond the page view event.
Automatically sending user data
If you don’t want (or can’t) alter your pixel implementation, you can also opt-in for Facebook to collect the data automatically from website forms.
While I usually advocate for sending data explicitly (for increased accuracy) this scraping method is usually good enough for increasing Event Match Quality with minimal effort.
- In your Business Manager, navigate to Events Manager
- Click the Data sources icon on the side menu
- Select the relevant Pixel
- Select the Settings tab
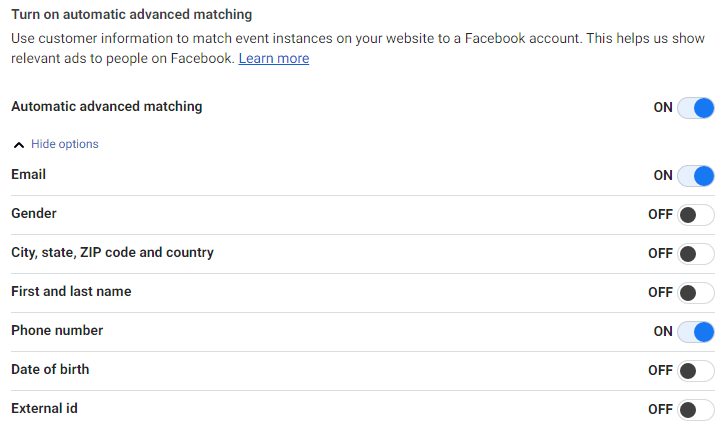
- Below the Automatic Advanced Matching section, click the toggle ON.
- Select Show Options.
- Toggle ON the parameters you want to share from your website. For optimal matching, select Email and Phone Number
Once setup is complete, it may take up to 48 hours before you see results in the Events Manager.