With the sunset of Google Analytic Universal (aka UA), many sites not only had to migrate their tracking to GA4 but also are now dealing with exporting the data from their legacy accounts.
Google has stated that the data in legacy accounts will be retained for another year (July 2024), so marketers need to find a solution for exporting their important data ahead of that.
In this guide, I’ll walk you through one option for retaining your data using Google Sheets and the Google Analytics Add-on for Google Sheets.
Rationale
Exporting the GA UA data is important. That being said, not all the data we have in GA counts. We don’t want to export data that is too old or too granular. How old is too old and how granular is too granular? That’s up to you to decide.
Additionally, there are fancier ways to pull the data. You can plug into BigQuery or any other database to run fancy SQL on top.
I believe most businesses won’t need this and can settle for a quick manual export that will retain the key data points they need to understand year-over-year trends.
My suggestion is to do this manual export once (will take ~2 hours probably), using free tools such as Google Sheets, the Google Analytics Add-on for Sheets, and Looker Studio.
Step 1: Map the data you want to export
Before we dive into the technical details, we need to understand what data we want to pull from GA.
In Universal Analytics, the data is aggregated in tables, so the data structure is set in advance, for better or worse.
This means that we can only pull a certain level of granularity of the data. For example, any data fetched will be aggregated within a specific date range – a day, week, or month.
The data is formatted in the classic GA UA schema with Dimensions and Metrics.
Classic combinations for exporting are usually:
| Dimensions | Metrics |
| Source/Medium, Campaign, Landing page | Users, Sessions, Avg. Time on site, Conversions (all or specific) |
| Page path | Pageviews, Unique Pageviews, Avg. Time on page |
Important – Add the date dimension so you can later reference a specific day in your dashboard.
Step 2: Create a new Google Sheet and install the add-on
To start the export, create a new Google Sheet (you can do this by navigating to sheets.new).
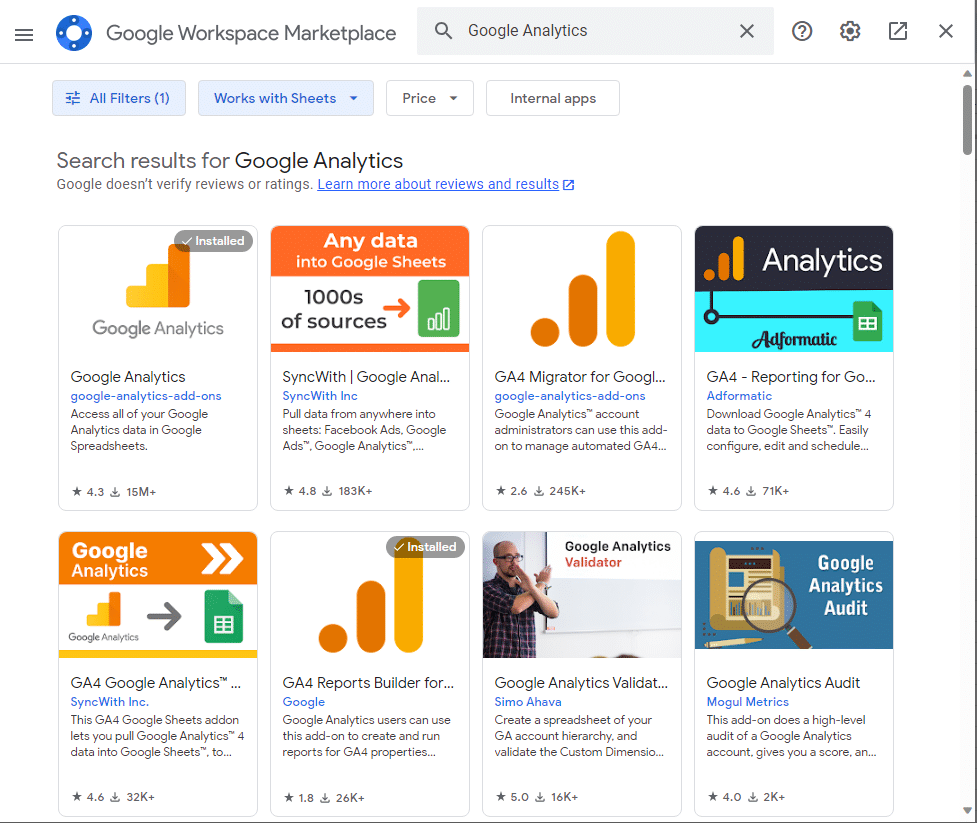
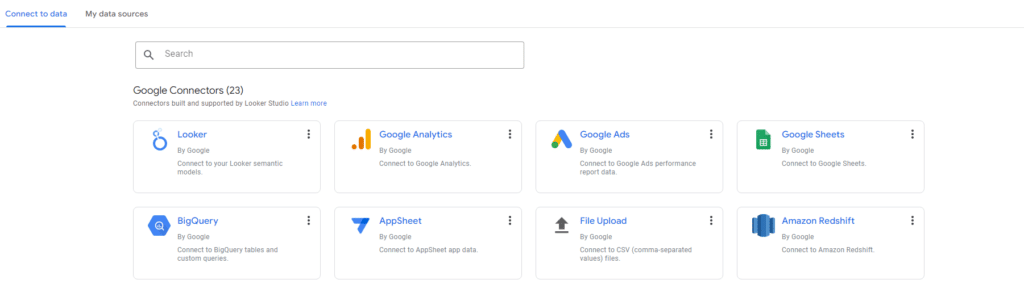
In the new sheet, click on Extensions -> Add-ons -> Get add-ons
Search for Google Analytics and add the pone on the top left-hand side (see screenshot).
Step 3: Configuring the add-on
After installing the add-on, you can create a new report by navigating to Extensions -> Google Analytics -> Create new report. This will open a new sidebar in your Google Sheets document.
The report configuration can be set once using the wizard. Simply select the account, property, and specific view you want the data to be pulled from.
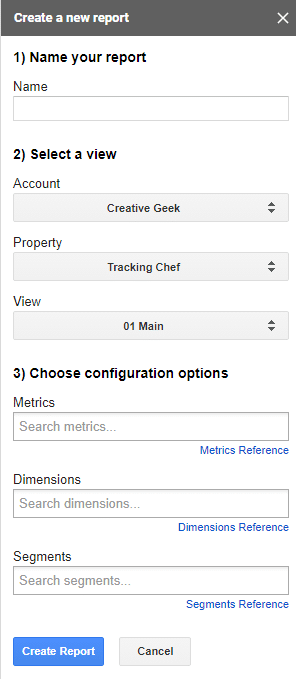
Next, select the specific metrics and dimensions you want to report on from the dropdown.
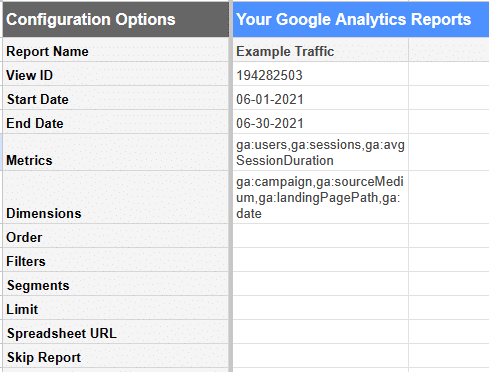
The output of the wizard is a screenshot below, which lists the specific View ID (more specific than property ID), the date range for the report, and the API names of the metrics and dimensions selected.
The report can now be run by navigating to Extensions -> Google Analytics -> Run report. If the report setup is valid, it will create a new tab with the name of the report and paste in the data from this report’s run. If a tab with this name already exists (i.e. this report has already been run) any existing data will be overwritten.
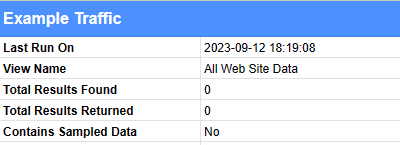
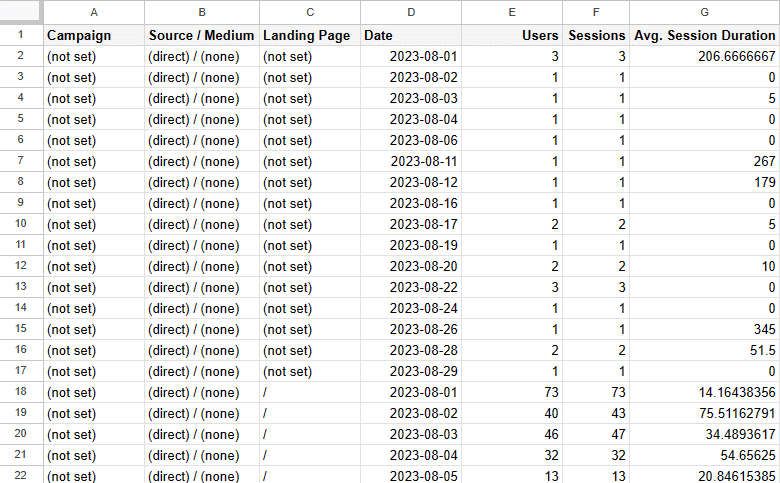
After running the report, you will see the report summary and the data table.
Important – Make sure that the report doesn’t contain any sampled data else it will be significantly less accurate. If that happens, try querying a shorter time frame.
Step 4: Editing the report
This is one of the caveats of this add-on: the wizard can only be used when creating a new report. Additional edits to the report must be done by manually changing the values in the report configuration.
Report configuration
View ID – Don’t change this unless you want to fetch data from a different view. The view ID can be found in the view settings tab in the GA admin.
Start date – This can be set to a specific date (MM-DD-YYYY format) or explicit strings such as 30daysAgo, 7daysAgo, today, or yesterday.
End date – Same as start date. Must be equal or later than the start date else the report will fail.
Metrics & Dimensions – The full list of metrics and dimensions can be found here in Google’s Explorer. It also shows which pairs can be matched under the same scope to avoid data clashes.
Order – This is the sorting that will be applied to the report. Add any metric or dimension, and add a minus sign to indicate descending order. Multiple dimensions and metrics can be used with a comma.
Segments & Filters – These can be used to pull specific data, e.g. only organic traffic, which in our case isn’t important.
Step 5: Exporting the data
Once we have our report configured we can start the manual labor.
We can set the report to extract 1-3 months of data for the query we want. Assuming no sampling occurred, we can then copy the report’s output to a new sheet which will serve as our database. Make sure to copy the column headers too.
This part is critical, as the next report’s run will overwrite the data, so we need to save it elsewhere.
Now set the report’s timeframe to the preceding 1-3 months. Run the report, check there’s no sampling, and paste the new data at the bottom of the “database” sheet. Add only the data rows, without the headers (which should be identical).
Repeat as many times as required to cover the timeframe you want to export (e.g. 18 months).
In the case that you want to pull multiple distinct reports (e.g. Acquisition and Content), create new tabs that will serve as “databases” for each report you want to create.
Step 6: Visualize the data
Go get yourself a beer, you’ve earned it.
After the data has been extracted, we can now visualize this data using Looker Studio (aka Data Studio). I recommend doing this early in the process (i.e. after extracting two runs of data) to make sure you have all the data points you want. Will be a bummer to have to repeat this process over a forgotten metric.
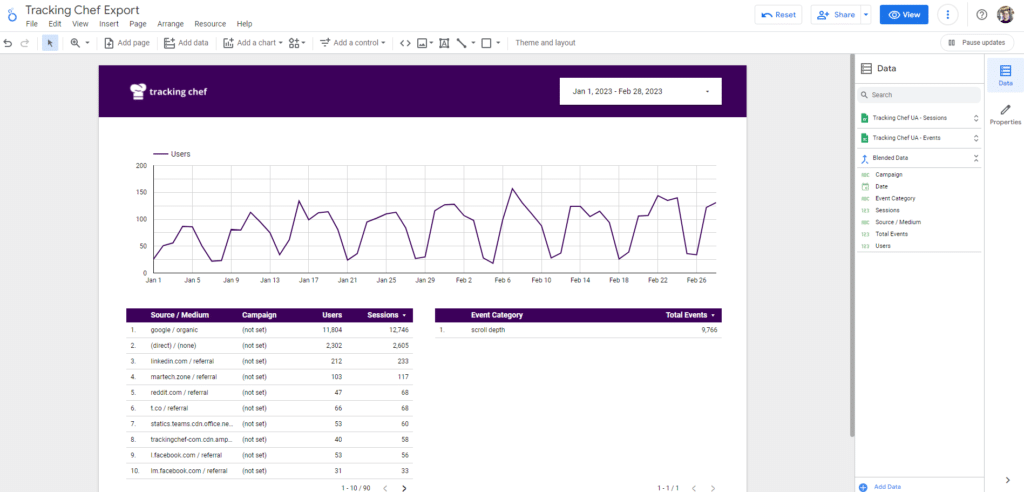
In Looker Studio, connect a new data source from Google Sheets and select the document and specific sheet that serves as your database.
You can now visualize the data in any way you choose, from charts to graphs and anything you imagine. The simple dashboard below is built purely from Google Sheets data extracted in this exact method.
Pro tip: Import to BigQuery
If you export a large number of rows, your database may become slow to query. If you’ve exceeded 100k rows, I recommend importing the data into Google’s BigQuery by following this great guide by Hevo Data.